
FREE Crochet Pattern - Molly Hayes' Crochet Cat Hat from Runaways TV Show
UPDATE 2/11/23: Added a little note about BLO, which for some reason I always forget all the time, but as a general rule, if you have known me for a while, you know I have a weird BLO preference. I just like the way it looks! IDK!
Follow me on Facebook for updates and other stuff! Free stuff! And check out my Etsy to buy stuff! Check out my Ko-Fi for patterns!

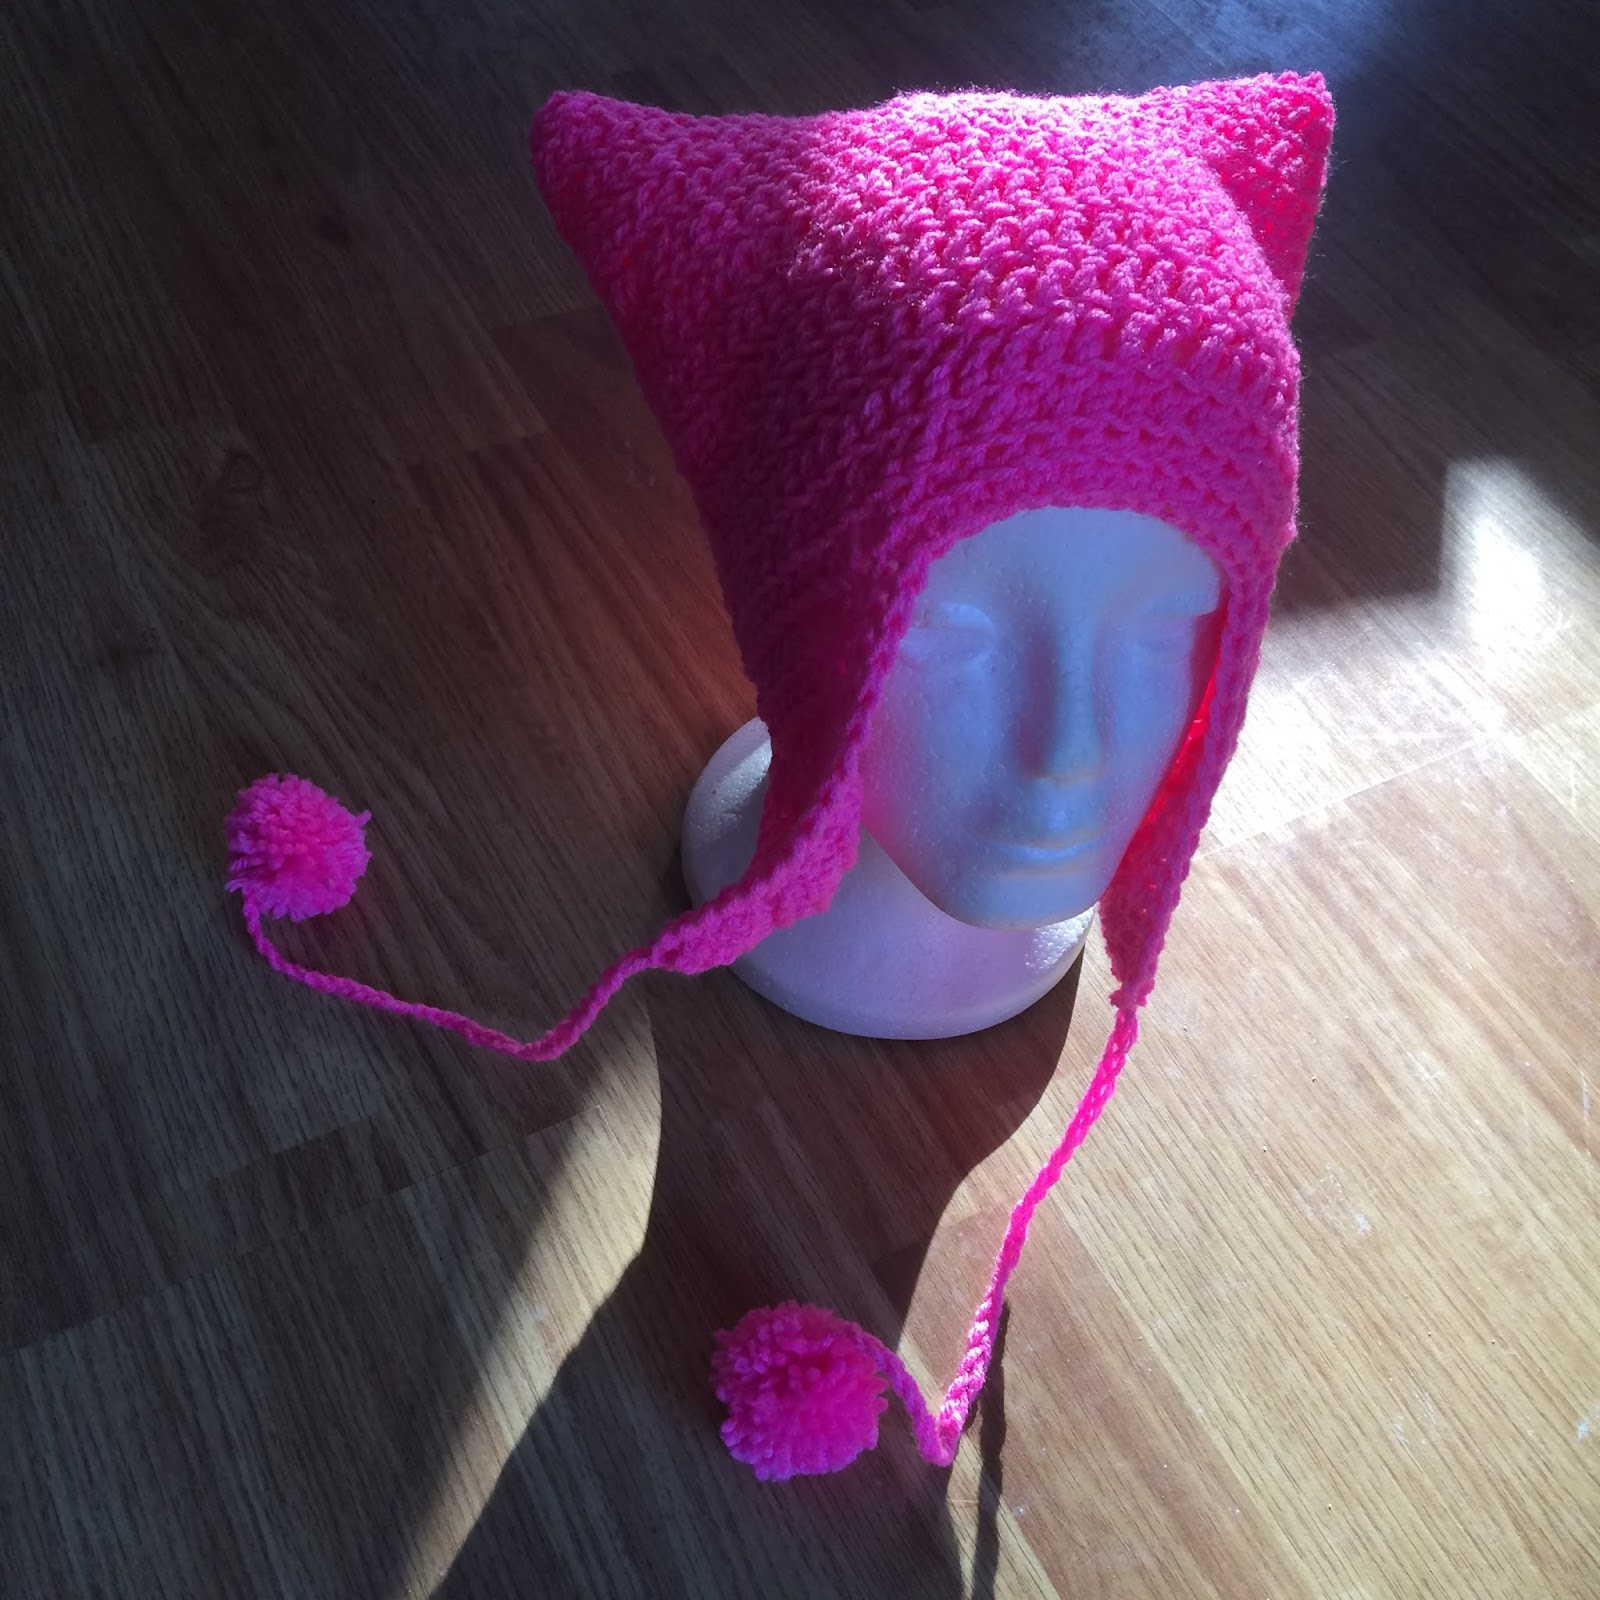
Molly wears a knit cat hat in episode 1 of Runaways, but let's forget that hat for right now. The superior hat from the first season is the crochet cat hat that she wears in a couple of the later episodes. If you're interested in the knit hat from episode 1 then stick around because I'm going to get to it, I promise! It just might take me a while on account of real life job.


NB: Before you get started, I used a J hook and the hat stitches came out a bit looser than intended. I recommend dropping down to an H or I, but be careful not to get so tight that it interferes with the sizing. This pattern is for a generic average-sized hat. IF YOU WANT A DIFFERENT SIZE, drop down your hook size more dramatically and it should get the job done.
What You Need:
- crochet hook (size H)
- pink worsted weight yarn
- 1.5" pom pom maker
- yarn needle
Skills Needed/Abbreviations
- ch: chain
- sl: slip stitch
- sc: single crochet
- hdc: half-double crochet
- dc: double crochet
- st/sts: stitch/stitches
- rnd/rnds: round/rounds
 You need to know how to work in the round and also flat, and you need to know how to seam crochet together. You can do this using your preferred method. I don't control your life. ;-)
I worked in back loops only, but it shouldn't be a huge deal if you don't.
Pattern
Main body of hat.
Starting at the top of the hat, leave a long tail to seam later.
Starting at the top of the hat, leave a long tail to seam later.
Ch 70, join to form loop being careful not to twist the ch;
Rnd 1: ch 2 (this is the 1st dc), dc in each ch around, sl in top of 2nd ch (70);
Rnds 2-10: ch 2, dc around, sl in top of 2nd ch (70);
Rnd 11: ch 1, hdc around, sl into the top of ch (70);
 Break off, go ahead and seam the top edge together flat because this makes the ear shapes.
Earflaps
With the hat laying flat and looking nice and rectangular, wrong side facing you, count 9 sts on either side of one of the flat edges, rejoin the yarn at the 1st st you just counted.
Row 1: ch 1 (this is the 1st hdc), 17 hc, ch 1, turn (18);
Row 2: hdc across, ch 1, turn (18);
Row 3: dec at either end, ch 1, turn (16);
Row 4-10: repeat 3 until 2 sts remain;
Break off and leave a very long tail.
Repeat this on the opposite side for the 2nd earflap.
Edging
 At one of the corners, rejoin the yarn, leaving a long tail, sc around the lower edge until you’re back where you started, break off the yarn, leaving a long tail. Rejoin the yarn at the opposite corner and repeat. You should have 3 long strands of yarn at the edge of each corner.
Braid the 3 strands together until the braided piece is about 9” then knot the end and attach a 1.5” pom pom. Trim excess.
Boom. Done. Happy crafting!
 Buy Me a Coffee


Comments
Post a Comment